There are two categories of links in HDC:
System Links used to organize drawing structure and other system elements. Such links are not managed directly by the user. They are created automatically by the system.
User defined links that indicate relations between objects. Example of such links can be Floor linked to Building or Space object linked to geometrical shape (Spot) on the drawing.
Understanding HDC links
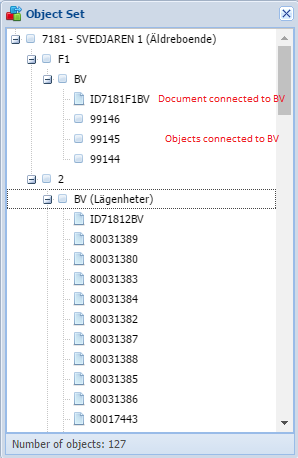
To discuss linking system we will use simple set of objects as on this schematic:

When discussing specific objects we can see links that are both incoming from another object and outgoing to another object.
Taking a Floor as an example, we have an incoming link from Building and several outgoing links to Documents and Spaces.
Based on those links data can be presented when combined with Perspectives. For a typical building tree view, we need a perspective as follows:
Building → Floor
Floor → Space
To show documents in a grid view, we will need a perspective:
Floor → Document
Managing Links
A show links function can be used to see how the underlying links are organized.
![]() Using linking functions in the Links panel and on the context menu is recommended for advanced users.
Using linking functions in the Links panel and on the context menu is recommended for advanced users.
A series of functions to show, copy and paste links is available on the context menu for each object.

When object is right clicked a popup menu shows up and a copy function will show how many links will be copied.
When using Paste function, links from clipboard will be pasted to selected, right clicked object.
![]() Direction of the link will always be as follows: Clicked object → clipboard objects.
Direction of the link will always be as follows: Clicked object → clipboard objects.
A sample below illustrates a typical situation, where for a building we have one incoming link from property, and several outgoing links for Floors and Documents.
The data is the filtered into specific views based on Perspectives.

Managing Links in a Grid View
Managing links using three basic functions available in a grid view is the simplest and most intuitive approach. It makes linking a lot easier without the need to follow the link direction rules.
Linking buttons in Grid View always relate to parent object selected in the tree view!
If that sounds odd, think about that as working on files within a folder. Grid view can be compared to showing a folder content. You can try that out by following those steps:
Select a Floor that has documents linked, check all needed documents. Notice that Copy links button becomes activated showing a number of links that can be copied.

When the links are copied, a Paste button is activated showing a number of links in a clipboard. Now select a new object where you want to link the documents:

Click Paste button and the documents will be linked under selected object:

If you wish to remove the linked objects, simply check them and use Unlink function.
Default Links
As each object can have multiple links, we can distinguish the main link (default). This link will be used when Show Object's Graphical Representation action is triggered.
![]() When Show All Representations action is triggered, number of Views is prepared. Such Views can be iterated using "next/previous" buttons.
When Show All Representations action is triggered, number of Views is prepared. Such Views can be iterated using "next/previous" buttons.
Copy & Paste links
Link to any object can be easily copied into "clipboard" (Right click on any object reveals Copy Link button).

Links to multiple selected objects can be copied at once
Previously copied link can be pasted to any object including vector elements on the drawing.
Context menu for all objects visible in the GUI has Paste Link button. Duplicate links are simply omitted.
Drag and drop - link creation
Users can easily create links between Tree objects and spots on drawing by simply dragging object from Tree over selected spot and dropping over it.
Drag and drop can only be done in Viewer Edit mode!

Delete linked Object
When deleting object all links are also deleted.
Delete is done with subtree of object according to selected perspective (defined in General System Settings). Only objects visible in selected perspective will be deleted, linked objects from other perspectives will not.
If there is a link from Space to Building and we want to delete Floor in "Deep Delete Mode", the Link to Building will not be followed for "Building -> Floor -> Space" perspective.

When selected for delete Object, have children, than you can see Preview of all Objects that will be deleted.
Popup Properties
If spot have valid link than by hovering or clicking on it (based on your settings) you can see it's linked object properties.

This dialog also allow to quickly edit object properties, copy them or paste new value.
![]() Useful links: Guide: Working with Popup Properties on Drawing
Useful links: Guide: Working with Popup Properties on Drawing
Default Object in Grid View Tesslet
After selection of object a Tree View tesslet, a number of linked objects are loaded into a Grid View.
If no object is marked as default, a first tab will be opened, and a first object (document) will be selected and shown.
To alter this behavior, user can choose one object in that set and use Set As Default function.
Automatic selection of tab works as follows:
- For given source object (e.g. Floor) and perspective (e.g. Document) only one target object can be set as default.
- The same object will be marked as default in parent class tabs (e.g. Document and Architect)
- If no tab was previously selected, first tab will be opened
- if there was a tab selected, last used tab will be opened but only if it contains any objects, if not, the first visible tab will be opened.
- if default object is set, tab and page containing that document will be opened

Edit right is needed for source object to use Set as Default button (rights for Object selected in Tree).
Important
Default Object is based on connection between Tree Object and Grid Object in given perspective.
That means each Grid Perspective can have different Default Object (even if Objects are same).